I had to do a double take when I looked at today's date. Not only did December sneak up on me, it's flying by. Yesterday my family and I got our tree. The cats are having a blast with it, as always. It's hard to believe the holiday is right around the corner and I haven't wrapped a single gift.
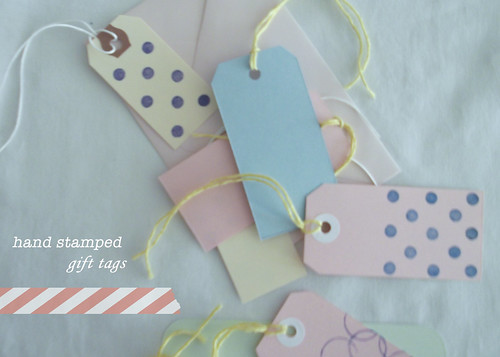
I did find time to make some gift tags over the weekend. The idea came from Martha Stewart's Encyclopedia of Crafts, which I checked out from the library. It's a wonderful and inspriing book. Projects and tutoriols are so accessible on the internet now that I don't look at craft books much, but it was very refreshing to flip through page after page of beautiful craft work.
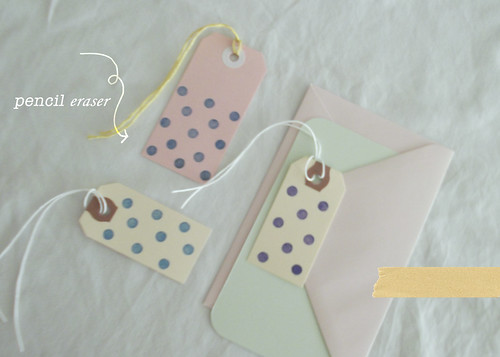
Anyway, there was stamping project using the erasers on the ends of No. 2. pencils to create little flower patterns. I went simpler and took the polka dot route, decorating a few shipping tags. After that I made a few of my own tags from card stock. A brand new pencil eraser will give you a perfectly round stamped circle, but for some fun I did a bit of stamping with worn erases, too. The end of a glue stick provided a nice circle stamp as well, and I enjoyed making patterns with it.
Hopefully I can get some presents wrapped this week and put these tags to use.
Happy Holidays everyone!
Tuesday, December 18, 2012
Friday, November 23, 2012
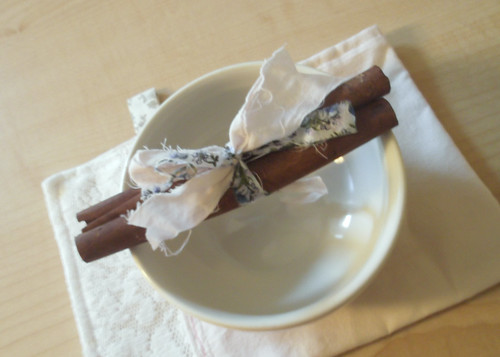
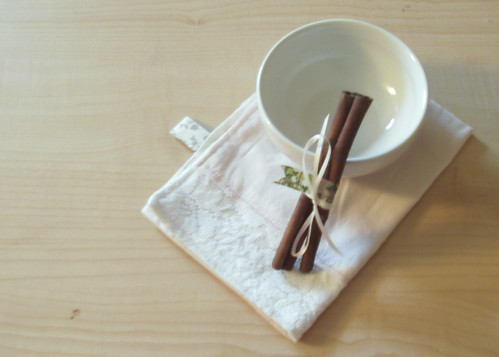
DIY // Rustic Cinnamon Stick Holiday Table Decorations
Here’s a quick idea I had
for holiday table decorations that don’t fall into the trap of traditional
holiday colors. There’s a spool of scrap
fabric ribbon I’ve been adding to, and I thought some of it would look nice
tied around of a bag of cinnamon sticks I found from last Fall. I’m a sucker for any kind of pastel fabric
paired with natural materials.
For this project you’ll
need some cinnamon sticks, various ribbon, washi tape and anything else you think would be fun to work with.
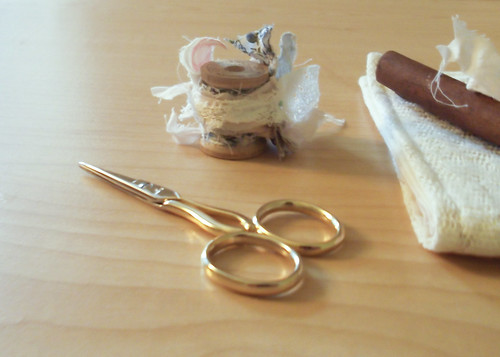
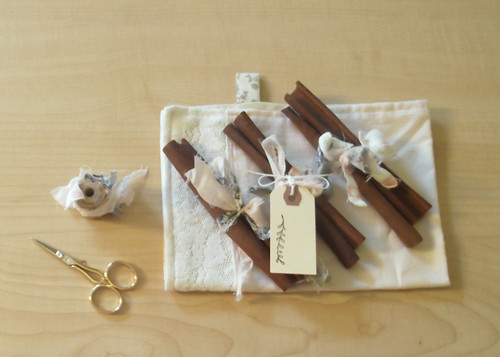
To make the fabric ribbon, collect some scraps and cut them into
strips. You can mix and match the sizes. Tie them together and wind them onto an empty
spool.
Cut 18” of the ribbon and
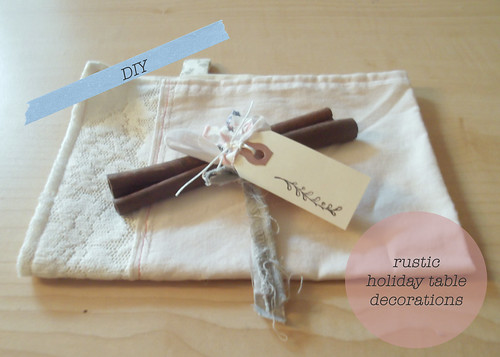
tie it around the cinnamon sticks. I
used two sticks, but feel free to add more – just be sure to cut a few extra inches of
ribbon. These are nice to sit on napkins
for place settings or to accent a centerpiece.
To make place cards, you can tie on a shipping tag as well.
After making a few with
the fabric ribbon I decided to break out the washi tape (because I love to add it to everything) and tried making one that way.
It looked a little plain so I added a thin strip of cream polyester
ribbon. The tape gave it a nice modern
look.
Pine cones would be
another way you could try to make these.
The idea is to find materials to work with that are in season, but to
have fun with the colors you accent them with.
Experiment with what you find and show me what you make!
Wednesday, November 14, 2012
Little Joys // Postcards, Postage Stamps & Paper Goods, Oh My
In the never-ending task
of organizing all of my things so that I can re-claim and re-decorate my
bedroom, I went through my ephemera collection yesterday. Right now most of it is tightly nestled in
photo paper boxes and small plastic bins, but I’m working towards getting
everything displayable. One day
everything will be tucked into nice albums and binders that will rest on my
coffee table.
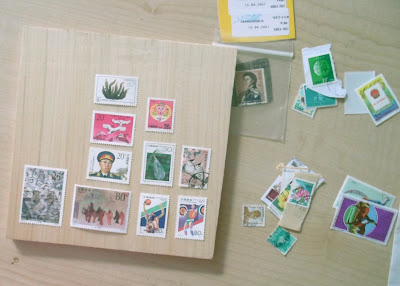
I started collecting in my
junior year of college. Always a snail
mailer, my first passion was for postage stamps, but I quickly became attracted
to the materials the stamps were attached to.
Today I also collect postcards, art cards and ads from art shows, and everything
else in-between.
Looking through everything
on days like this is one of the most rewarding parts about collecting. There’s this little rush of comfort and
content I get from filing through familiar pieces and sorting out new
additions. I once read that collecting
is the result of an unused trait leftover from the days when we were
hunter-gatherers. There’s something
really beautiful and primitive about that, don’t you think?
photo boxes full of fine
art advertisements
new stamp arrivals from China, Japan
and Korea
ready to be sorted
a box full of unsorted
paper goodies
one of my favorite pieces;
this hung on the wall of my old studio to remind me to take a breather and
smile each day
Monday, November 5, 2012
Happy November! I hope everyone is well on this Election Day eve. This is going to be a busy and exciting month for me because I will be launching a new line of hair bows in my shop, and I will be a braidsmaid in my cousins wedding in just a few more weeks. It's already getting very chilly outside, and although the beautiful Fall leaves are still in warm vibrant color, it looks like the Fall weather has left for the season. I hope you enjoy this Monday's Picks inspired by warmth and love.
via aneedleinthehay
via leboxboutique
via SoFino
Thursday, October 11, 2012
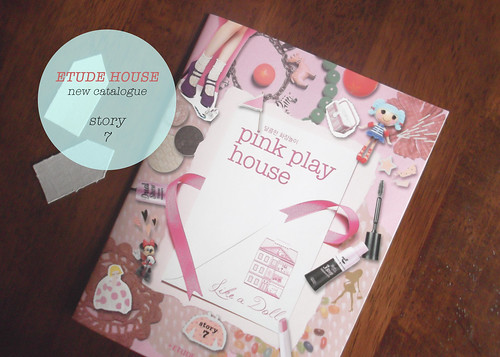
Crafting Inspiration from the New Etude House Catalogue
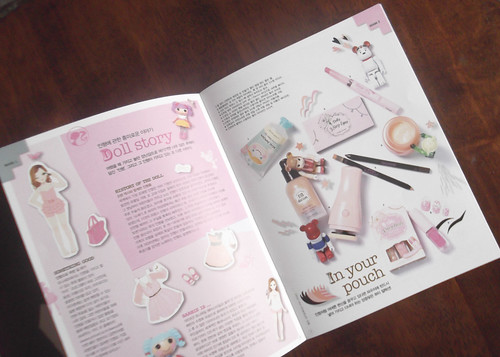
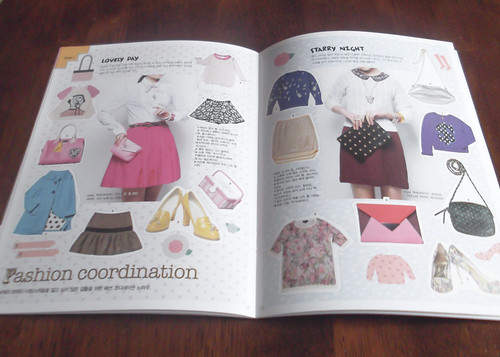
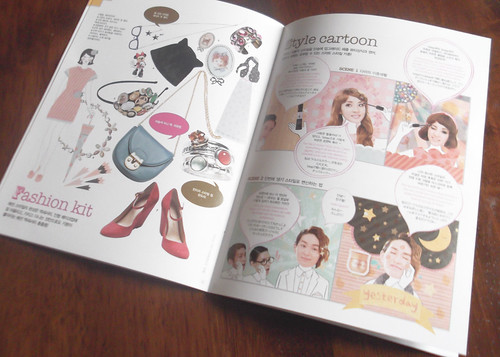
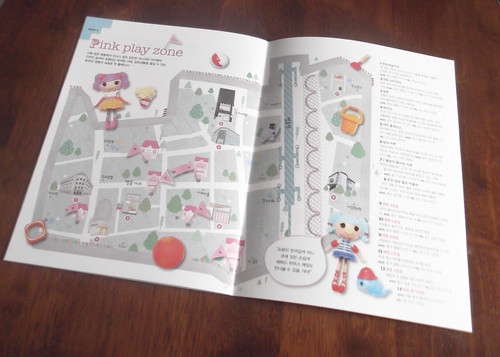
I received the new Etude House catalogue in the mail! It’s so lovely that I had to take a few
pictures to share. Earlier this year a
snail mail pal in Korea
sent me a copy of their last catalogue.
I completely fell in love with the design and she was kind enough to
send me a copy of the newest one when it came out. Their catalogues are themed around a doll
house and are designed like a scrapbook.
They’re so fun to look through and if you do any kind of collage work
there is a lot to be inspired by.
All of their products have adorably designed packaging. I don’t wear make up, but I’m a sucker for
pinks and pastels. They provide great
pallet inspiration.
This style cartoon would make a fun scrapbooking technique,
don’t you think?
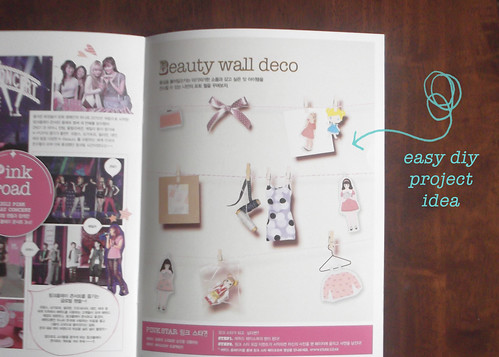
In the back of this issue there was a little project idea
for a kind of clothes line version of a mood board. They stretched a few feet of bakers twine
across a wall, and then used mini clothes pins to hang up little bits of
decorative ephemera. Try it out!
Labels:
books,
collage,
color,
craft,
diy,
etude house,
inspire,
Korean,
scrapbooking
Monday, October 8, 2012
Vintage Goodies from Little Maison and Antiquaria
I was very excited to learn that I was winner of the
Antiquaria giveaway hosted by Little Maison.
Insert “I never win anything” speech here. The set of four vintage napkins arrived in
the mail last week and were more lovely than expected. The colors are so bright and perfect for Fall. I’m already trying to think of an excuse to
plan a little dinner around them. Also,
they were accompanied by the most adorable card from Peter Pauper Press. I’m a stationery junkie so of course that
went right up on my wall.
Thanks a bunch!
Labels:
antiquaria,
fall,
housewares,
little maison,
stationery,
vintage
Saturday, October 6, 2012
Murakami Artist Trading Card
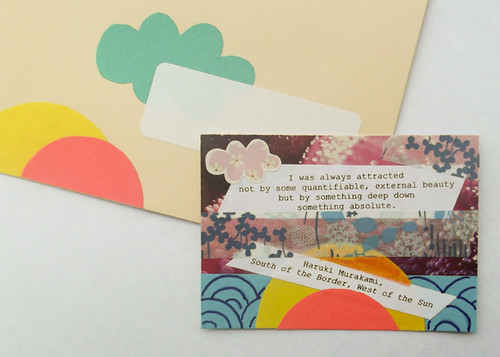
Anyone else make artist trading cards? I started creating and collecting them about
four years ago. They’re really great for
when you have an idea you want to work out for a larger piece or for when you
feel like doing a little collage work, and they make terrific snail mail. Here’s a Haruki Murakami inspired one I made
and mailed out the other day – with matching envelope!
Friday, October 5, 2012
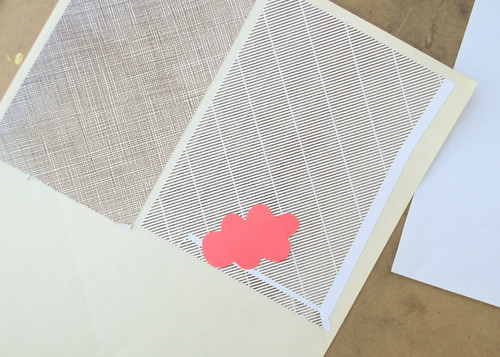
Neon Cloud Stickers
It’s been a busy Friday.
This week we got behind on a lot of cleaning around the house and I’ve
been trying to make up for it all day.
Usually, I don’t enjoy cleaning, but today I was in one of those moods
where all the little things were jumping out at me like the drapes that needed
washing and the spring coasters that are out of season. I did manage to squeeze in a little creative
time this afternoon to try making some stickers.
This is a project I’ve been thinking about for a while, but
I never have the time to dedicate to it.
While I was cleaning up some paper scraps I started playing around with
layering different colors and patterns and decided today I would give the
stickers a try.
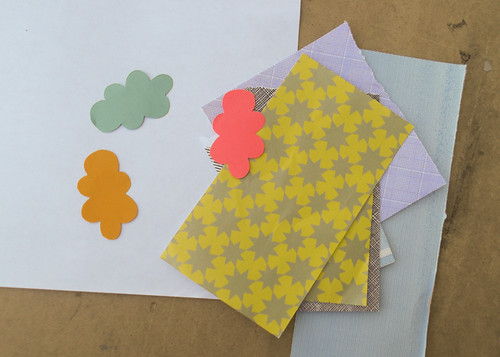
I cut out some little cloud shapes from neon paper scraps
and tore apart a few used envelopes. I
affixed the security paper from the envelopes to some self-adhesive laminating
sheets using spray adhesive. After those
dried I applied the neon clouds the same way.
I’m still not sure how I want to cut them out yet, but I’m
happy with the results so far. The
security paper patterns really make the neon colors pop. It gives the clouds a kind of levitating effect
that is pretty cool. On the down side, I
now have spray adhesive all over the front steps of the house and will have to
try to scrub it off the cement. The
price of crafting!
Have a lovely and productive weekend everyone!
Monday, October 1, 2012
Monday Picks: Goodbye Summer
Summer
is coming to a close. I spent the last few
weekends enjoying the warm weather outdoors at a lovely butterfly garden, a
nature hike, and of course the county fair.
Here are my picks for this Monday, inspired by the bright colors and
flowers I will miss, though I have a feeling we won’t need to put the
sunglasses away any time soon.
Recycled
summer paper bunting from Peony and Thistle
Vintage
pink and gold sunglasses from Holdenism
Neon
wooden bowls from Wind & Willow Home
Floral
stud earrings from Starlight Woods
Have
a beautiful week!
Sunday, September 23, 2012
DIY // Invisible Bathroom Drawer Organizer
Happy Sunday everyone; I
hope you all enjoyed your weekend. Here’s
a quick and easy DIY project to kick off the new week. I missed our last recycling pick up and had
an overflow of plastics and glass in our little milk crate that we keep in the
kitchen. This inspired me to take out a
few items and reuse them around the house.
One of them was a plastic cookie container from the bakery that got
transformed into this neat and simple drawer organizer for my bathroom.
Here’s what you’ll need:
- 1 plastic container with
at divided sections on the bottom
- a pair of scissors
Step 1. Rinse container. If there are any stickers or labels on it,
run them under some warm water before gently peeling them off.
Step 2. Cut along the plastic hinge that connects the
top and bottom of the container. Be sure
to sure to cut down any sharp edges.
Step 3. Place container into a drawer and get
organizing.
Wasn’t that easy?
Monday, September 3, 2012
Relaxing Monday Picks
In the spirit of Labor
Day, this Monday’s picks will help you relax and unwind. I hope everyone will have a clam, stress free
week and be able to make some time for you.
Haruki Murakami’s
Norwegian Wood is the book I have been unwinding with each night. It’s deals with the themes loss and change but doesn’t
drown you in the subject. Instead,
Murakami’s words gently lull around you and pull you effortlessly into the
memory of the main character. It is engrossing
without pulling you in so deep that you can’t step out; that’s why it’s the
perfect book to help get your mind off the day for an hour before bed.
Even if you’re not a tea
drinker, you will be soothed by Teavana’s Monkey Picked Oolong. Its delicate flavor unravels from whole tea
leaves in a light balance of earthy sweetness.
Any time of day is perfect to treat yourself to a cup and escape for a
bit. While you’re at it, why not enjoy
that tea in these adorable cups from Dawn Vachon? I find their pastel pallet irresistible and
am impressed by the illusion of softness she has managed to create.
Finally, I couldn’t
mention relaxation without pointing you in the direction of Lush’s Dreamtime bath melt. Drop this into a tub of hot
water and your bath will be transformed into a calming sea of jasmine,
lavender, chamomile and sandalwood. It’s
aromatherapy qualities make it perfect for just before bed time.
Saturday, September 1, 2012
Fragrance Inspired Stationery
I have some letters to send out to friends and decided to make a new stationery set, inspired by Marc Jacobs' Oh, Lola! packaging. I have no idea how the fragrance smells, but the design is wonderful. The bright flower shaped perfume card caught my eye in the department store and I picked up a few of them, intending to use them for crafts. Once I got them home I realized they were too pretty to cut up or paste to anything, so I tucked them away in my ephemera collection.
To hold my snail mail, I wanted to make something quick, colorful, and playful. I remembered the Oh, Lola! cards and dug them out. What attracts me most about the design is the bold use of color and shape. The loosely defined petals are layered to create a poping flower that jumps right out at you, and I wanted to create a similar effect for my envelopes.
Instead of flowers, I cut out some black and white bird pictures and pasted them to vibrant printing paper. To add to the playfulness, I used contrasting colors instead of monochromatic ones. After cutting them out and leaving a generous border, I picked some backing paper and cut out large organic shapes. I layered and pasted them all to some blank pastel manufactured envelopes I had.
After making the bird ones I decided to create another set using some blank labels. I'm happy with how they both turned out and can't wait to mail them. I definitely want to toy around with this idea some more and perhaps make some influenced by Jacobs' Daisy fragrance bottle.
Thursday, August 30, 2012
Head In the Clouds
1. Installation
by artist Dietrich Wenger
2. Hot pads from designer MasamiAkatsuka
3. Polymer
stud earring from Ku Ki Shop
4. Wallpaper by designer Amiee Wilder
Wednesday, August 29, 2012
DIY // Chic & Discreet Prescription Containers
It’s called the medicine cabinet,
but experts say that’s the worse place to store your pills. The heat and
moisture generated in the bathroom can break down medicine and make it less
effective. So, where do you keep all those prescription bottles where they
will be out of sight, but still convenient to access?
Tea tins provide a perfect cool,
dry, and light proof environment for storing your meds. After you’re done with your favorite bag or
loose leaf tea, keep the container! I prefer ones that come in a square
shape because I can fit at least four pill bottles in them. Round containers give
you space for about three – and if they’re tall containers, you can always
stack them.
All you
need for this project is a nice tin and your favorite roll of washi or deco tape. Most tea tins already have fancy package
design, but I still like to deck mine out a little. Find
a cute tape that compliments the tin and use it to line the top and bottom
edges. If the container has a label, border your tape around it.
Put a little tape around the rim of the lid, or across the top, for a unified
appearance.
Once your
new container is decorated you can transfer your pill bottles into it. Now you
can store your meds on your bedside table, kitchen cabinet, or shelf without having it
looking like a mini pharmacy. This also keeps nosy house guests and
visitors from checking out your prescriptions.
For meds that you need to take on
the go, you can create a mini version of these containers by cleaning out lip
gloss or other small cosmetic tins. Since these are so small I just put a
little washi tape around the lid. Transfer the pills you need to take
with you inside and pop your new pill case in your bag or purse.
Don’t have the kind of containers you want at home? This is a great project for thrift store or flea market finds. Hunt down some small vintage tins and aluminum containers. Japanese candy tins also work great for this. As usual, you want to keep all prescriptions out of reach of children and pets.
Enjoy!
Tuesday, August 28, 2012
DIY // Color & Texture Swatches
I’ve never been the type
to keep a sketchbook. The writer in me
always takes over and I end up jotting down lots of tone words and long
descriptions of my ideas. Visually, I
rely on color and texture instead of sketches. Both have always evoked strong emotion in me,
so when I’m planning out ideas I try to match up different textures with pallets
that speak to my written descriptions.
As a result, I end up
keeping every scrap of paper or fabric, small or large, which inspires me or
holds my attention. You can imagine the
mess I create when I pull all of them out and spread them around the floor,
sorting and selecting. Besides being a
hassle to pick up, it also becomes difficult to store so much stuff when I have
to keep taking it out again.
To make this whole process
easier I recently made my own color and texture swatches. They’re super simple to make and great for
creating color and mood boards for projects.
You can also scan them to use for design and digital scrap-booking. All you need is a stapler, some sturdy
backing paper, scissors or paper cutter, and a selection of your favorites
scraps.
Here’s what I did:
Step One: Gather materials. You can see that I used a wide variety,
including tissue paper, different fabrics, ribbon, vellum, vintage book pages,
handmade paper, and various ephemera.
Don’t be afraid of bold patterns or textures. Candy wrappers, various textiles, and found
items are all fair game. Use whatever
jumps out at you and gets your wheels turning.
Have fun with it.
Step Two: Prepare the backing paper. It’s best to keep them on a light solid color
that will not compete with your swatches.
I used perfume sample cards and also cut up a few blank index
cards. You can also use card stock. Whatever you chose, make sure it’s sturdier
than the materials you will be attaching.
The next thing you’ll want to do is cut them down to size. Most of mine are about 2” x 3.” They don’t have to be systematic, as long as
they’re easily handheld and sortable.
Step Three: Cut out your materials. This is the fun part. You don’t want them to be much bigger than 1”
x 2 ½” or they will start to overpower the backing paper and contend with your
other swatches. If the color or pattern
is not the same all over, cut out the area that you like best, or cut out
several areas for a mini set. For sheer
and transparent materials I sometimes cut two pieces or longer strips, then fold
or overlap them to show the change in opacity.
Step Four: Assemble your cards. Center your swatches on your backing paper
and staple them at the top. I used
staples instead of glue because I wanted to be able to lift the swatches and
drape them over other materials to see how they interact together.
All that’s left to do is
to find a convenient container to store them in. I’m still looking for something small and
cute and might go thrift store hunting for some vintage tea tins. Now you have your very own swatch set to help
visualize all your creative thoughts.
Enjoy!
Monday, August 27, 2012
Head Back to School
Each Monday I will be
bringing you my favorite finds from around the web. This week’s picks are all about heading back
to school. Whether going to middle
school, college, or getting ready to tackle that Masters, these unique supplies
will be great for you or someone you know.
Omoi, a Philadelphia, PA
based zakka shop, is now offering these stylish eco-friendly Decomposition Books. With college and gird ruled pages
made completely from post-consumer waste and soy based ink, these notebooks are
sure to keep you green in the coming semester.
While back to school
shopping with my sisters last weekend I saw lots of great canvas backpacks
everywhere, but most of them had leather trim or accents. That’s why I love this Neon Trim Denim Backpack from TOPSHOP made from cotton and polyester. It’s a wonderful alternative for vegans and
others who like to keep leather-free.
No matter what you’re
studying, pencil bags are a must. Even
if you don’t carry around writing tools, this pouch from Skinny laMinx also
makes a great cosmetic bag. The
Cloudbirds pattern pops in all three colors, and also provides a nice graphic escape
from the ever-present chevron pattern.
You can’t go wrong with
anything from Cavallini & Co. and these scenic white erasers are no
exception. It’s like having a little
postcard in your pencil bag to correct all your mistakes!
Labels:
back to school,
etsy,
monday picks,
omoi,
stationery
Sunday, August 26, 2012
At Last, Strawberries!

This summer I planted some Chandler strawberries. My mom bought me
three plants and I transferred them into some small planters on the
stoop. Two of the plants were completely dried up by the intense heat
wave we had, but this little one hung in there.
The first harvest was very small and the berries died before reaching
full ripeness. I did my best to protect them from the harsh afternoon
sun during the following months and added more soil conditioner.
Finally, three little berries produced this August. It was so exciting
to watch them change from bright green to ripe red. It happened so
quickly! Unfortunately, the smallest of the berries started to rot on
the vine. Looking back, I think I should have picked that one sooner.
Nevertheless, these two made it! I picked them for my breakfast,
diced them up and ate them with a drizzle of honey. They were very
juicy and a touch on the tart side, but still worth the wait.
Here’s hoping for a third harvest!
Ready. Set. Go.
Hello:
My name is Lauren and I am
an artist and writer, currently taking a pause from pursuing my BFA (art school
is expensive!) I love cats, art history,
and working on my stamp and postcard collections. Not being immersed in the art community has
been difficult, but I’ve been trying to make an effort to keep creating while I
job hunt. One good thing is that I
finally have time to focus on some of my other passions like making stationery
and hand bound books. I look forward to
sharing all the beautiful things I use, create, and am inspired by with you
all.
Best,
Lauren
Subscribe to:
Posts (Atom)

